Thursday, May 30, 2013

WIRE crochet ring tutorial

Hello !! today's tutorial is a wire crochet ring <3 !! It is so easy !!!It won't take you more than 3 minutes  

 Γεια σας !!! το σημέρινο tutorial είναι ένα πλέκτο δακτυλίδι από σύρμα !! Είναι πανέυκολο !!δεν θα σας πάρει περισσότερο από 3 λεπτά

You will need: 
scissors 
a crochet hook we  used the number 2,5
and some thin silver wire


Θα χρειαστείτε 
ένα ψαλίδι 
ένα βελονάκι νουμερο 2,5 
και  λεπτό σύρμα 

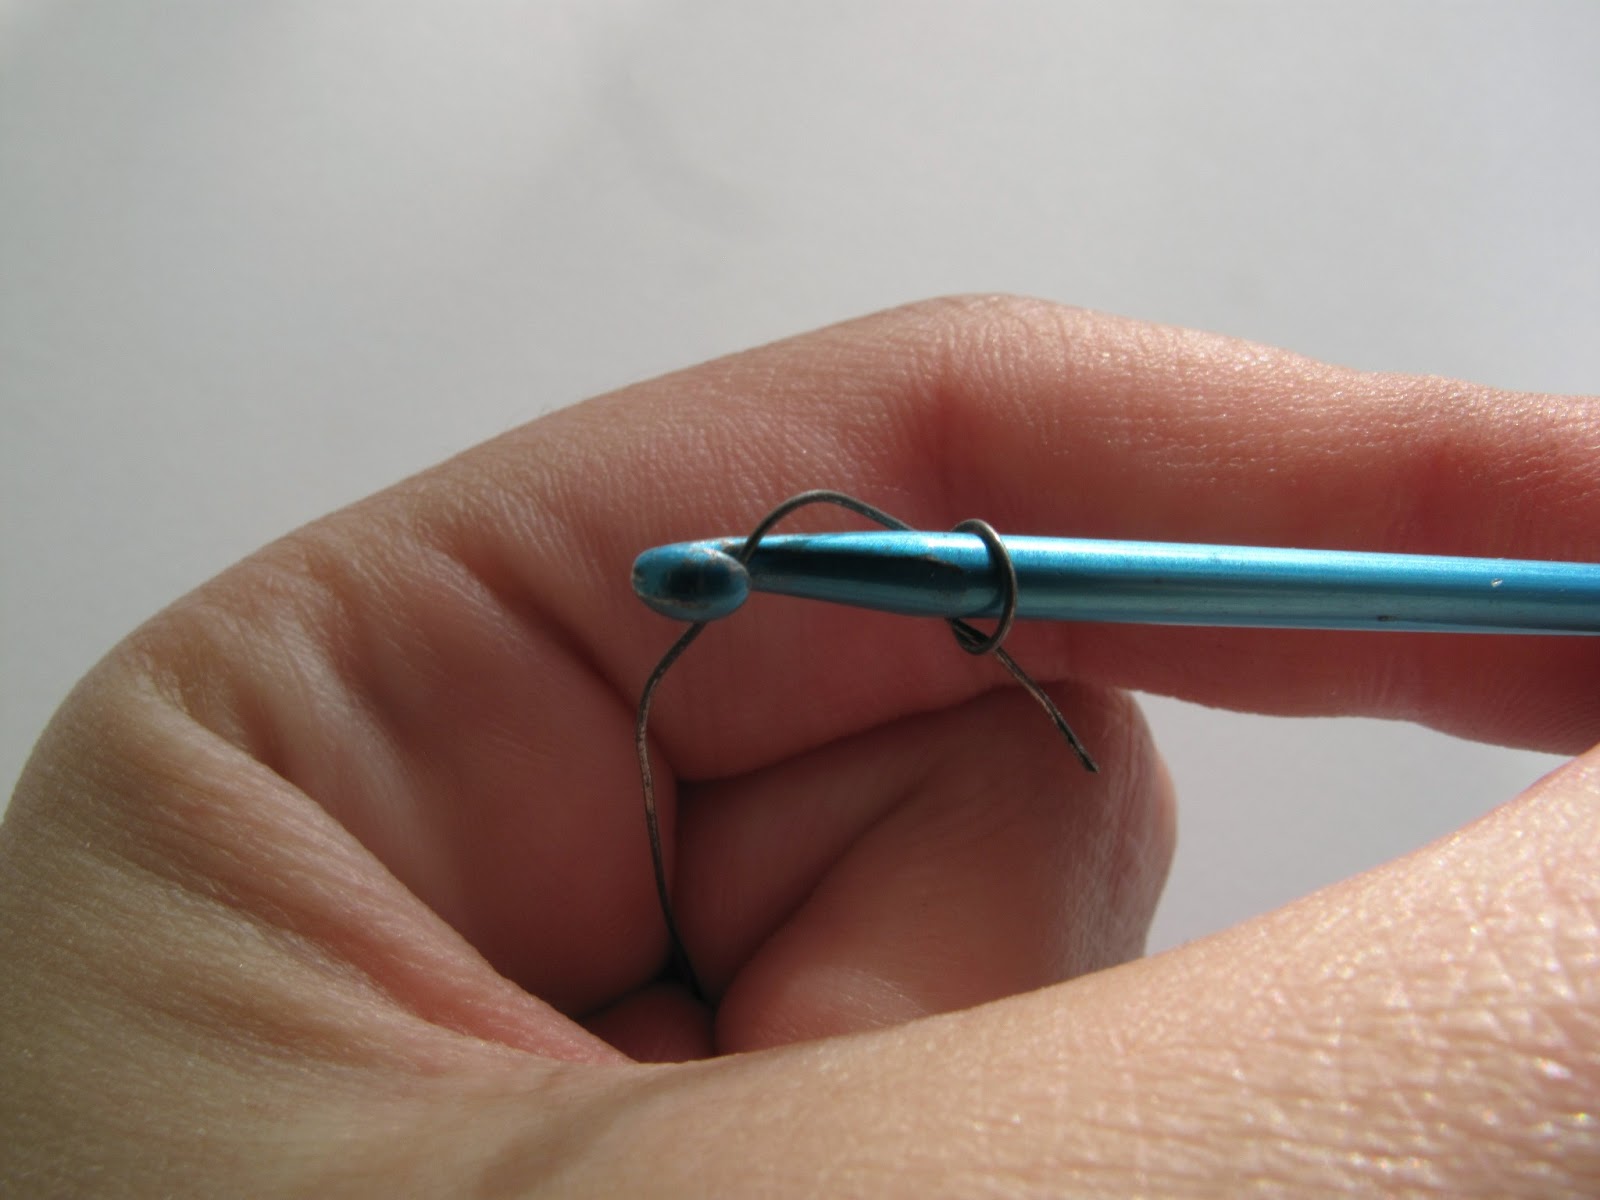
First with the wire make a knot around the crochet hook

Αρχικά με το σύρμα κάντε ένα κόμπο γύρω από το βελονάκι 

                                           Then wind the wire around the crochet hook


                                      Μετά τυλίξτε το σύρμα γύρο από το βελονάκι

                                                And wire it through the previous loop

                                   Και περάστε το μέσα από την προηγούμενη θηλιά

                                                   Repeat it for about 15-17 times

                                       Επαναλάβετε το για περίπου 15 με 17 φορές

                       Finally twist together the 2 edges and cut the rest of the wire with the scissors

        Τέλος γυρίστε μαζι και τις 2 άκρες και κοψτε το υπόλοιπο σύρμα με ένα ψαλίδι

Et voilà!!!


                                    You can also add some beads and create beautiful  rings

                                   Μπορείτε ακόμα να προσθέσετε μερικές χάντρες
                                   και να δημιουργήσετε πανέμορφα δακτυλίδια


Another plastic bottle tutorial!


Όπως έχετε καταλάβει μας αρέσουν πολύ  τα πλαστικά μπουκαλάκια γιατί μπορείς να τα γεμίσεις με οτιδήποτε θέλεις και υπάρχουν τόσες πολλές εναλλακτικές!Το σημερινό μας όμως tutorial είναι λιγάκι διαφορετικό γιατί δεν θα τα γεμίσουμε με τα συνηθισμένα , πχ χάντρες, glitter κτλ όμως θα χρησιμοποιήσουμε ένα φυτό!
As you have noticed, we love little plastic bottles beause you can fill them with anything you want such as beads, glitter etc. However today's tutorial is quite different because we won't fill them with the usuall stuff but we are going to use a plant!

λοιπόν, θα χρειαστείτε:
''πέταλα'' καλλιστήμονα(μαζέψτε τα από το πάρκο ή από τον κήπο του σπιτιού σας)
πλαστικό μπουκαλάκι (σε ό,τι σχήμα θέλετε)
you are going to need:
"petals" of callistemon(you can find them at the park or at your garden)
a little plastic bottle(in any shape you want)


Είναι πολύ εύκολο.Απλά μαζέψτε μερικά ''πέταλα'' καλλιστήμονα και βάλτε τα προσεκτικά μέσα στο μπουκαλάκι!
Συμβουλή: μια οδοντογλυφίδα θα σας βοηθήσει να τα τακτοποιήσετε όπου θέλετε!

It is very easy.Simply collect some callistemon "petals" and put them carefully in the bottle!
Tip: use a toothstick to help you place the petals wherever you want!


Είναι έτοιμο!Μπορείτε να χρησιμοποιήστε πετονιά για να το κρεμάσετε όπως εμείς ή κατι άλλο όπως αλυσίδα ή σχοινάκι.
Done!You can use fishing line , as we did, or something else like chain or cord.

Friday, May 24, 2013

bottle necklace tutorial!

Γεια σας!
Hello!


Αποφασίσαμε να γράφουμε τα tutorial μας και στα ελληνικά για εσάς που είστε Έλληνες και δεν ξέρετε να μιλάτε αγγλικά!Λοιπόν, το σημερινό tutorial είναι μια εναλλακτική στο προηγούμενο tutorial μας το jellybeans bottle tutorial.Το φτιάξαμε για εσάς που δεν έχετε πιστόλι σιλικόνης ή το μπουκαλάκι σας είναι πολύ μικρό
Today's tutorial is an alternative to our previous tutorial the jellybeans bottle tutorial.If you don't have a hot glue gun or your bottle is too small this tutorial is for you!


Θα χρειαστείτε :
Ένα μπουκαλάκι
Μερικές μικρές χάντρες στα χρώματα που σας αρέσουν
Αλυσίδα
Κούμπωμα

You are going to need:
a small bottle
a few small beads in the colours you like 
chain
a clasp


Γεμίστε το μπουκαλάκι με τις χάντρες. Εμείς επιλέξαμε πράσινες, μπλε,και χρυσές για να ταιριάζουν με την αλυσίδα.
Fill your bottle with your beads.We used green,blue and gold so that they match with the chain!


Περάστε ένα jump ring στο μπουκαλάκι και βάλτε το στην μέση της αλυσίδας σας!
With a jump ring connet you bottle with your chain! 


Τέλος βάλτε το κούμπωμα!
Finally add your clasp!


Και τελeιώσατε!
And you're done!


Wednesday, May 15, 2013

Flower earrings!

Welcome spring with this easy peasy tutorial!

You will need:


Supplies:
2 flower cabochons(you can make your own with fimo or you can find them at your local craft store)
super glue
earring posts


Add some glue on your earring post


Place your cabochon on your earring post and hold them together until the glue dries
Repeat for the other cabochon!


Done!Your flower earrings are ready!


Friday, May 10, 2013

Double chain necklace tutorial

hello!!! :D Today we are going to do a double chain necklace tutorial  with beads !!!
You will need :
21  geometric orange beads 
6 geometric mint green beads 
2 jump rings 
2 crimp rings 
90cm of black chain 
and 18cm of triger tail 
                                                            String:
                                                                       3 orange beads 
                                                                       1 green bead 
                                        Repeat this pattern 6 times and then string the orange ones left


                                                 Make a hook and attach a crimp bead
                                                            Now adjust a jump ring
                                               Measure 26cm,and join the beads with the chain
                                                Finally do the same for the other edge!!!

                                                                        Et voilà !

Wednesday, May 8, 2013

DIY lace skirt

Hi guys !!so today's tutorial is about how you can transform an old skirt into this cute lace skirt !! believe me it is super easy !! and you won't face any sewing problems ;)
You will need :
a ( denim ) skirt 
a  sewing needle 
a skein of thread 
and some lace the same size as the bottom front edge

Before you start sewing ,it is important to pin the edges of the lace to the skirt so that you can sew it  straight ;)
 
Now sew the lace to the skirt 

                                     And you are done ;)  so simple


Fabric bracelet tutorial!


Today's tutorial is great for those fabric scraps you have laying around!


Supplies:
3 fabric stripes a little longer than the size of your wrist
chain
Barrel cord ends
clasp
strong glue
jump rings

Now let's start!


Glue the barrel cord end with your fabric stipes and chain.


Then braid them together.


Finally  glue the other end with the barrel end and add the jump ring with the clasp.


Done! It wasn't difficult, was it;

UPDATE:
Sorry for the pictures it was night and we hadn't done this before.Hope you can get the idea.

Sunday, May 5, 2013

Lace headband tutorial

hello !!!
  today we are going to do a super easy lace headband tutorial


The materials you will need are :
scissors
an elastic headband
a mesuring tape
a sewing needle
a skein of thread
some lace
and a silicone gun ( optional )

                                                First cut the headband to about 15cm
                                   After you have cut the edges use a silicone gun and glue them ( optional )

                          Now put the needle with the tread throw the elastic part that you have cut

                                                              And carefully sew the elastic part to the lace 
  After you finish tie the thread on the wrong side and cut it with the scissors
                                                 Do the same for the other edge

                                                                     Et voilà!!!